
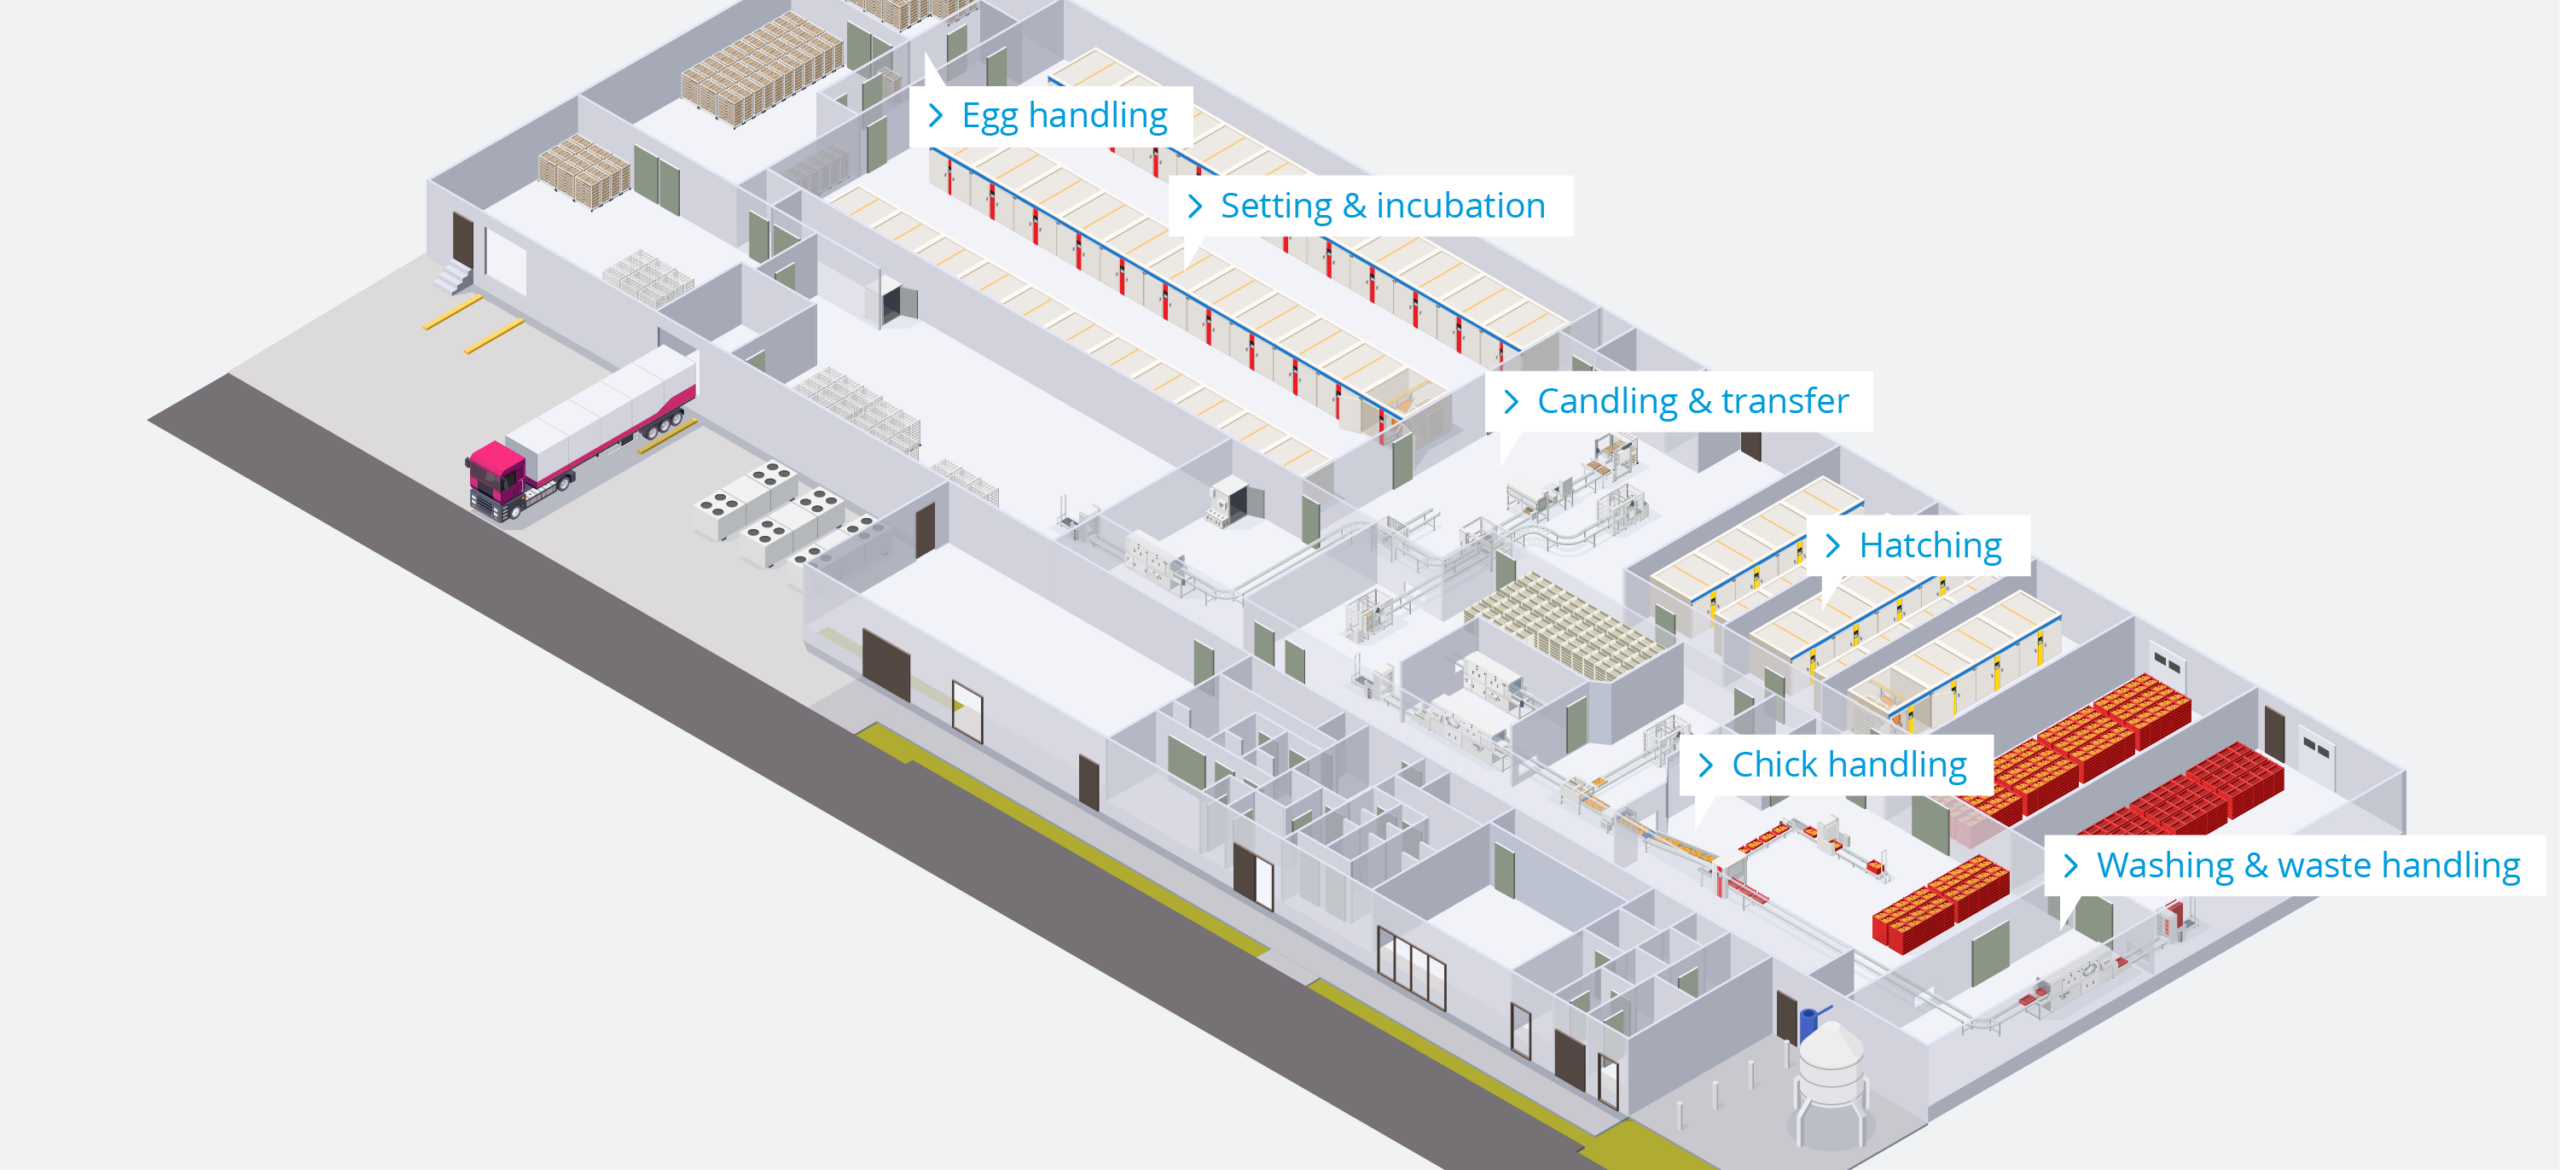
Hatchery
The hatchery is a specialized facility in the poultry industry where fertile eggs are incubated under controlled conditions to hatch into chicks.
Hygienic entry
The hygienic entry area at a poultry farm refers to a controlled and designated zone where individuals, including farm workers, visitors, and service providers, must adhere to specific hygiene protocols before entering the main production area of the farm.
Rearing
Rearing farms providing optimal conditions that promote the healthy growth and preparation of the young birds for their future roles as egg-laying hens or broilers
Layer
A layer farm is dedicated to raising hens specifically for egg production. In a layer farm, the primary focus is on maximizing egg production while maintaining the health and well-being of the laying hens. These hens are referred to as "layers" because they are raised primarily to lay eggs that are collected for human consumption.
Grand parent
A grandparent (GP) farm, also known as a grandparent stock farm, is a specialized facility in the poultry industry that is dedicated to breeding and producing the initial generation of breeding birds. These breeding birds serve as the foundation for the production of parent stock, which in turn produces the commercial broilers or layers that are raised for meat or egg production.
Broiler
A broiler farm is dedicated to raising chickens specifically for meat production. The chickens in these farms are known as broilers. These farms focus on efficiently producing chickens that reach market weight within a relatively short period, typically around 5 to 7 weeks, depending on the desired size, market preferences and regulations.
Biosecurity programsfor poultry farms
Poultry
Cleaning and disinfection inside hatcheries
Cleaning and disinfection at the egg handling area
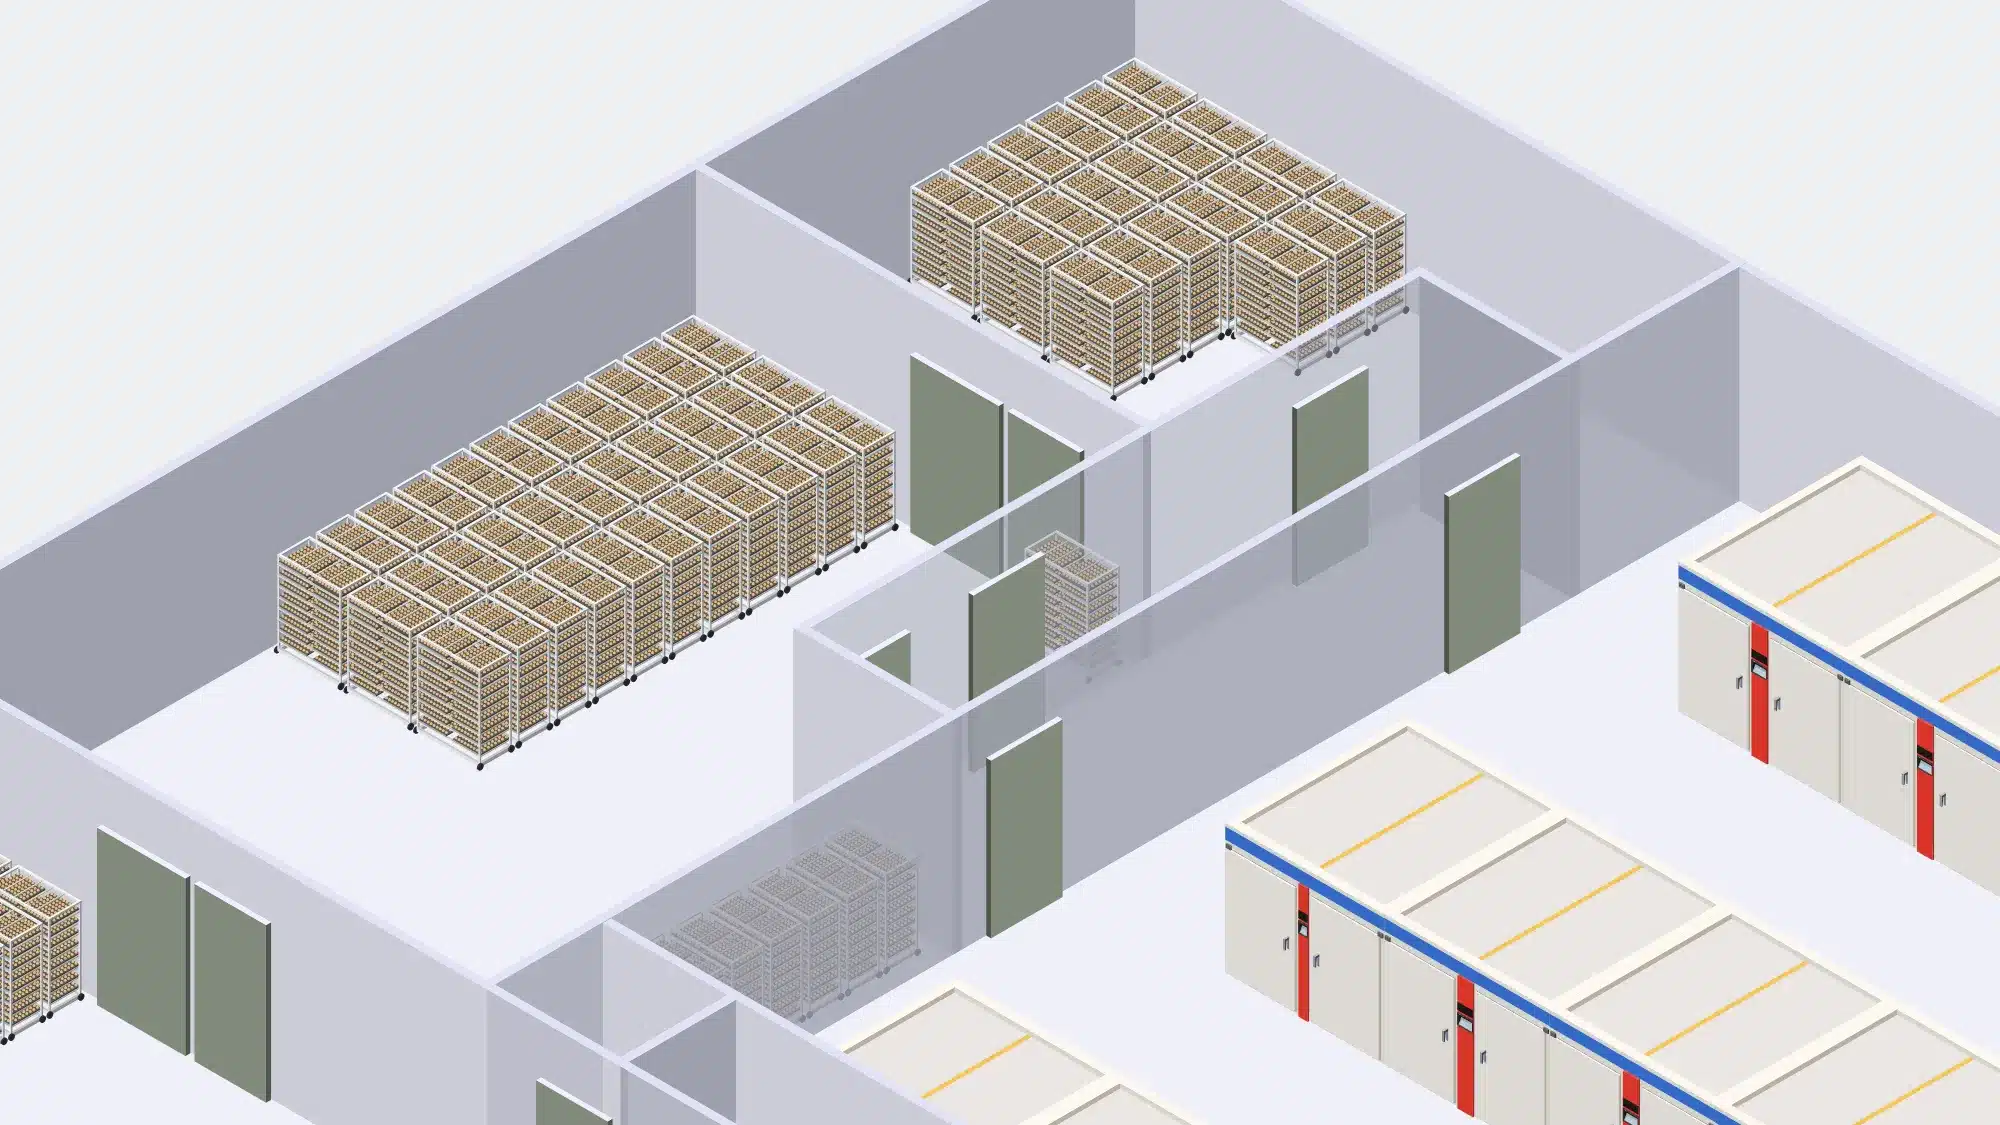
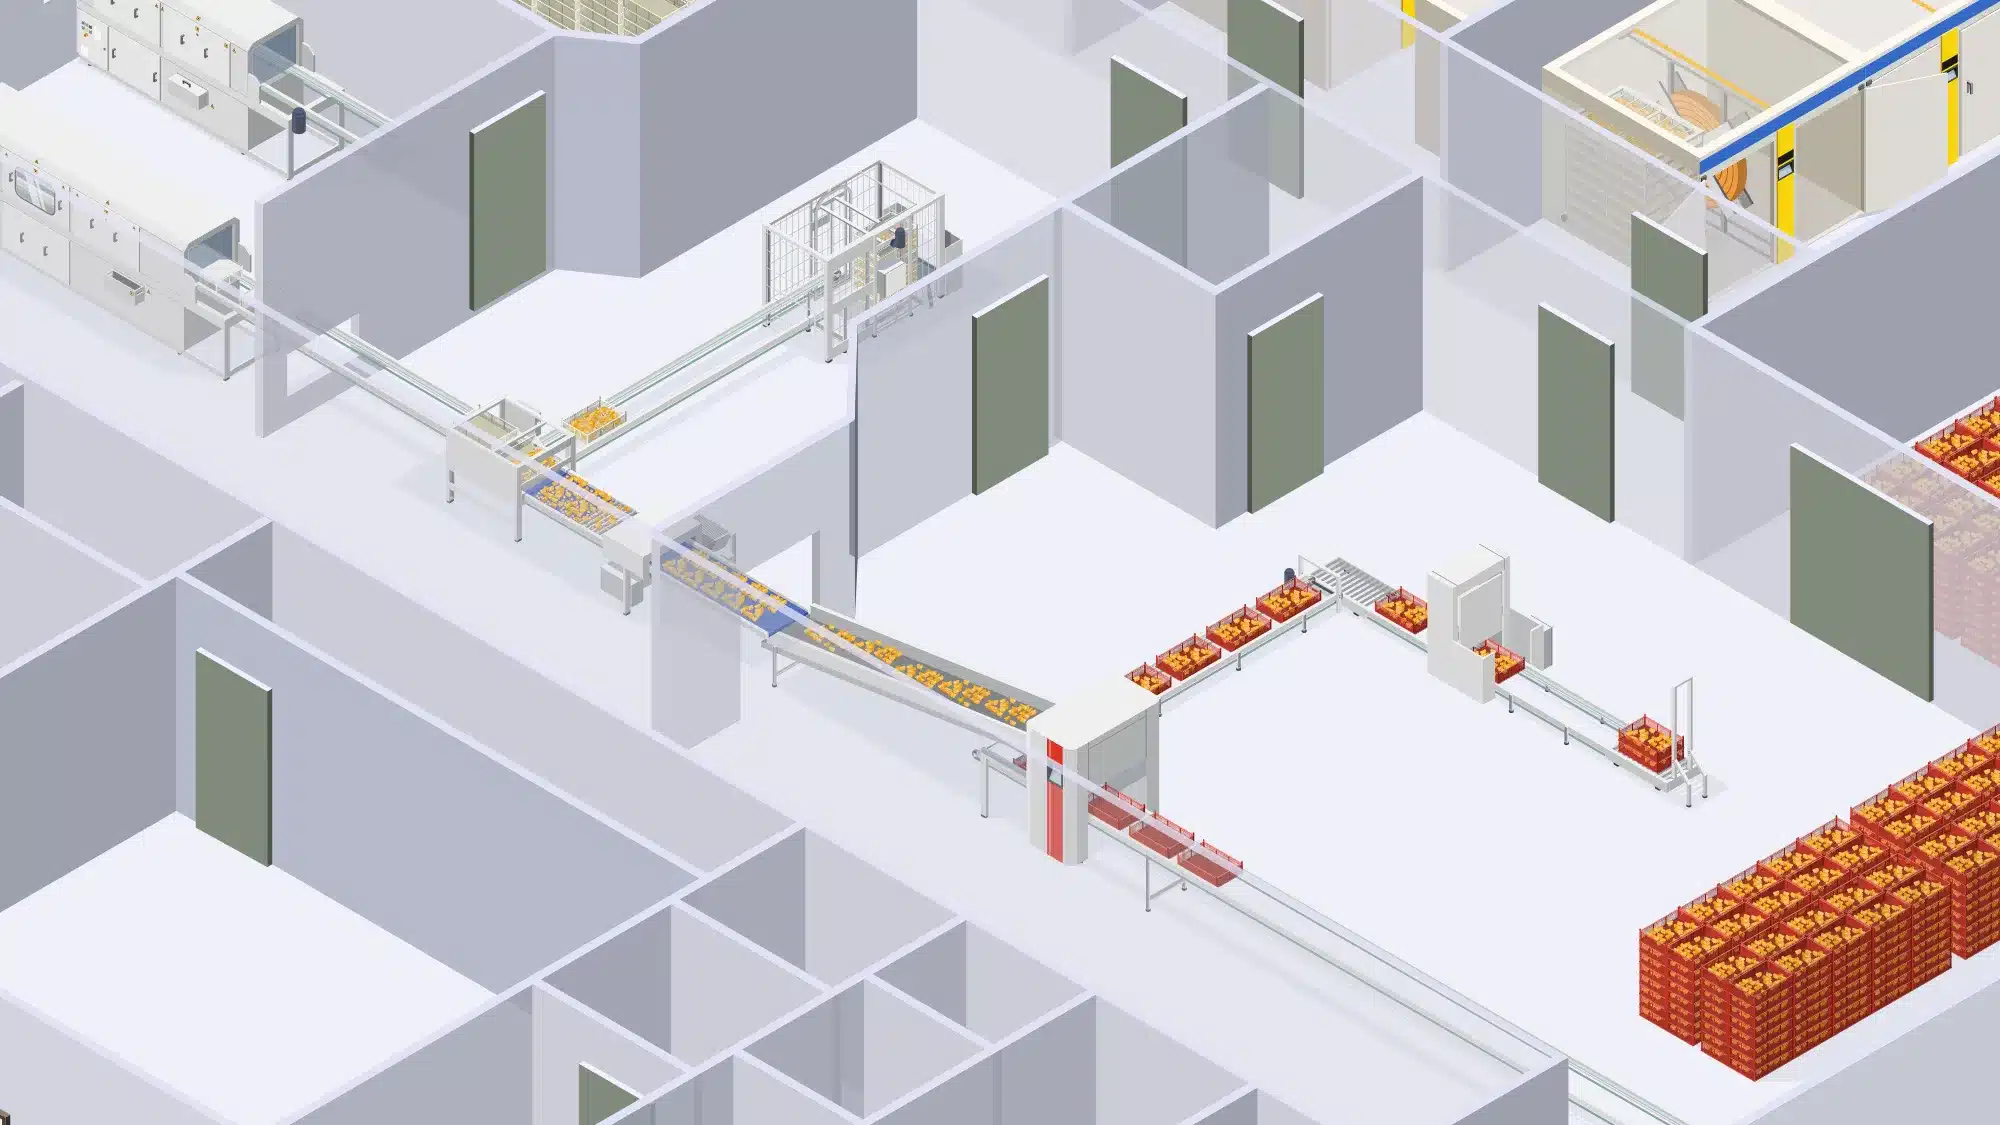
Egg handling at a hatchery involves the careful collection, inspection, and preparation of eggs for incubation.
Proper egg handling, cleaning, and disinfection practices are essential to prevent the transmission of diseases and maintain a clean and controlled environment for optimal hatch rates. Cleaning and disinfection during at egg arrival and handling in hatcheries includes:
Cleaning Process:
- Initial Inspection: Eggs are visually inspected upon arrival to identify and remove visibly soiled or damaged eggs.
- Dry Cleaning: Dust, feathers, and other debris are removed from the egg surfaces using soft brushes, air blowers, or vacuum systems.
- Wet Cleaning (Optional): Some hatcheries choose to wash eggs with a mild detergent solution or a specially formulated egg cleaner. However, this step is generally avoided to prevent moisture from penetrating the eggshell, as this could increase the risk of microbial contamination.
Disinfection Process:
- Sanitizing Solution: A disinfectant solution approved for eggshell sanitization is applied, usually through a fine mist or spray. It’s important to use disinfectants that are safe for the embryos and do not leave harmful residues.
- Drying: After applying the disinfectant, eggs are left to dry. Drying helps eliminate excess moisture and prevents the growth of microorganisms.
- Fumigation (Optional): Some hatcheries use fumigation with safe and approved gases to further reduce microbial load.
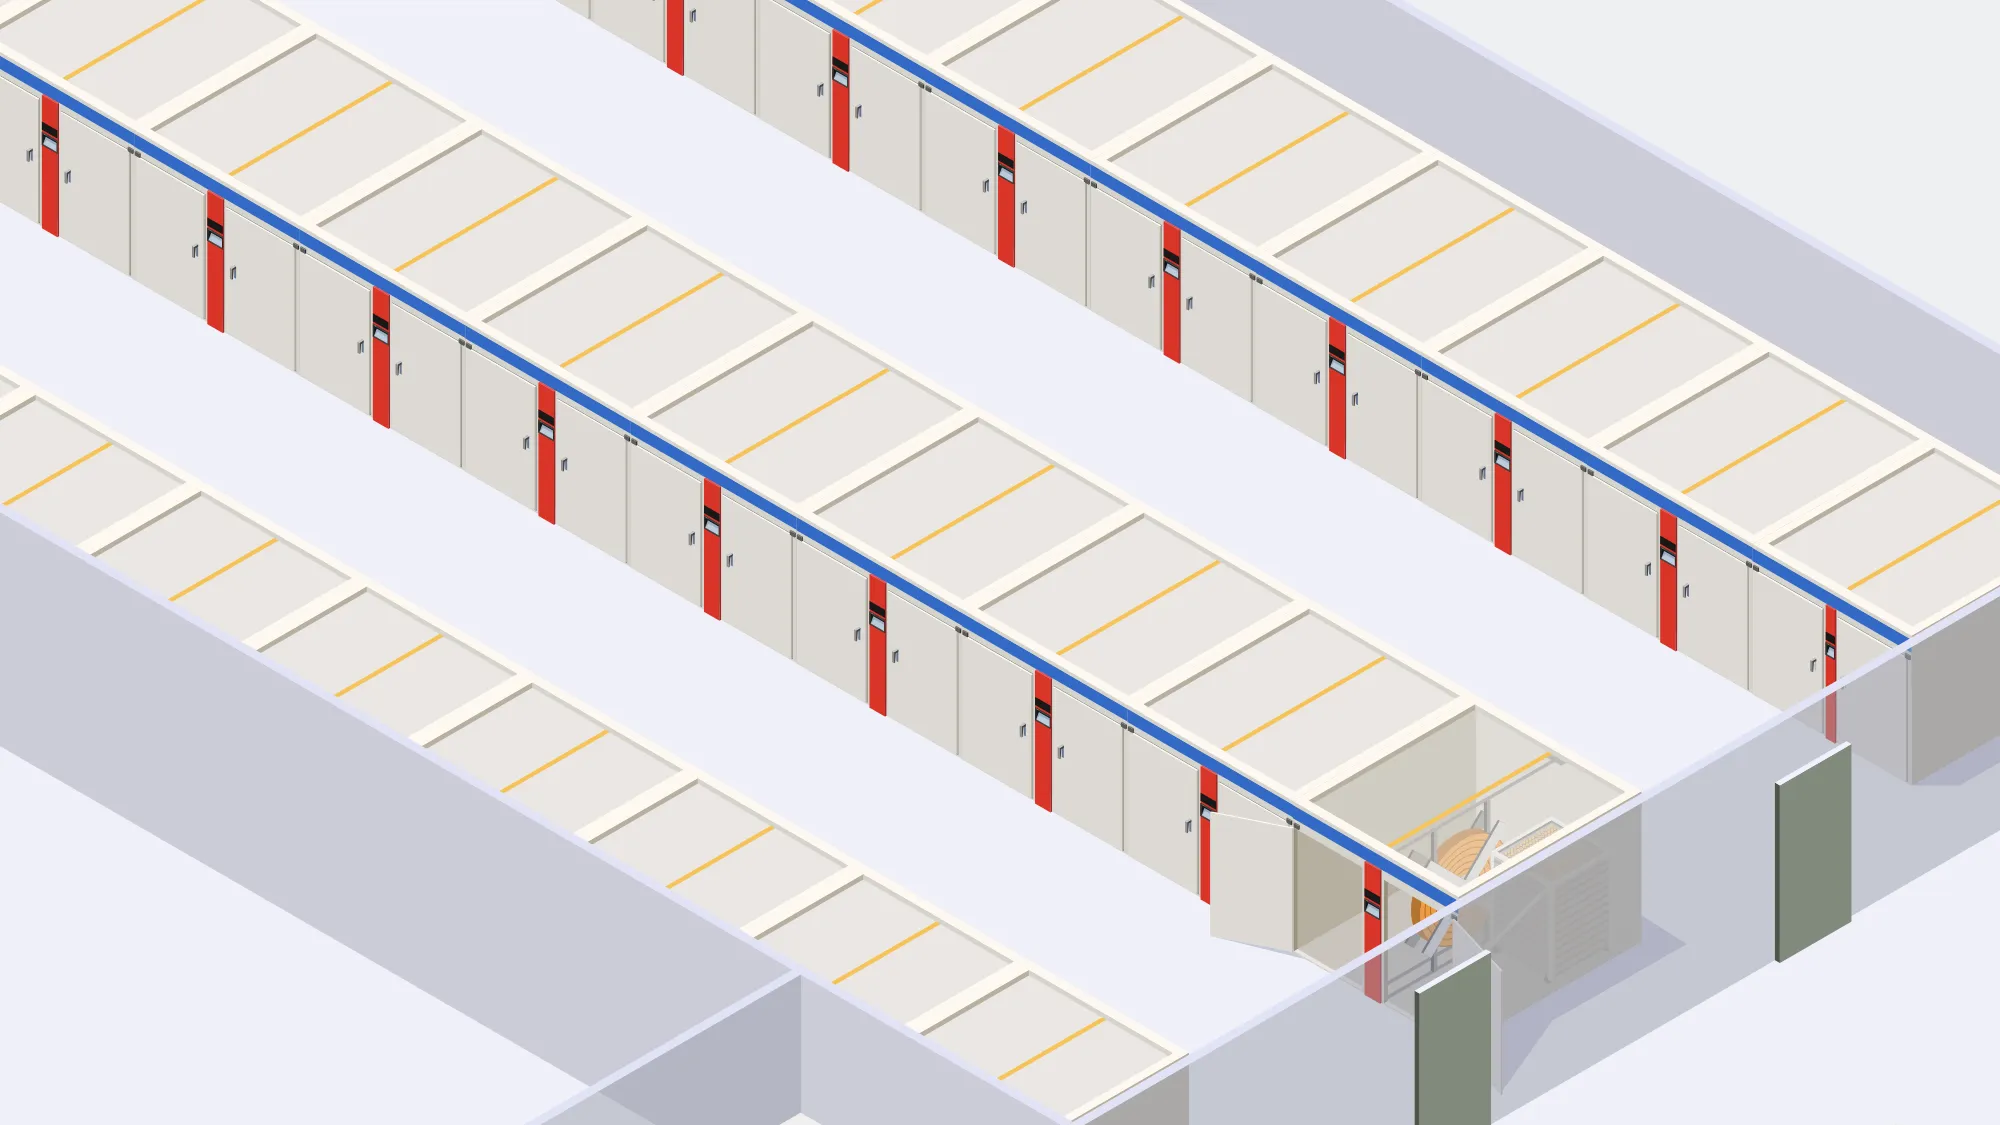
Cleaning and disinfection at setting & incubation
Setting and incubation are vital stages in a hatchery’s process, creating the controlled environment necessary for healthy embryo development and successful hatching.
Cleaning and disinfection of incubators in hatcheries are crucial processes to create a clean and pathogen-free environment for developing embryos. Proper maintenance of incubators ensures optimal hatch rates and the production of healthy chicks.
Cleaning Process:
- Preparation: Power off and unplug the incubator. Remove eggs and accessories.
- Dry Cleaning: Use soft brushes, cloths, or vacuum systems to remove dust and debris from both interior and exterior surfaces.
- Residue Removal: Gently eliminate stubborn residues without causing damage using a suitable foam cleaner agent, cleaning prepares the surface for disinfection
- Air Circulation: Allow the incubator to air out to reduce moisture content.
Disinfection Process:
- Choose a Disinfectant: Use an approved disinfectant effective against a broad range of pathogens.
- Prepare Solution: Follow the instructions to prepare the disinfectant solution and wear appropriate PPE.
- Apply Disinfectant: Ensure thorough coverage of all incubator surfaces, avoiding oversaturation.
- Contact Time: Allow the disinfectant to sit for the recommended duration.
- Rinsing (If Needed): Some disinfectants require rinsing, which should be done using clean water.
- Drying: Thoroughly dry the incubator to prevent microbial growth and electrical issues.
- Post-Disinfection Checks: Before reassembling, ensure surfaces are dry and free of residual disinfectant.
Cleaning and disinfection at candling & transfer
Candling equipment is used to examine the developing embryos inside eggs to determine their viability, while transfer equipment is used to move eggs between different stages of incubation. Keeping these tools clean and disinfected is crucial to prevent contamination and ensure the health of the embryos.
Cleaning Process:
- Preparation: Ensure that all equipment is powered off and disconnected from power sources before cleaning.
- Disassembly: Disassemble the candling and transfer equipment according to manufacturer guidelines to access all parts and components.
- Dry Cleaning: Use soft brushes, cloths, or vacuum systems to remove dust, dirt, and debris from all surfaces, nooks, and crannies of the equipment.
- Cleaning Agents: Use mild detergents that are suitable for the equipment. Avoid harsh chemicals that might damage the equipment or leave harmful residues.
- Cleaning Brushes: Use soft brushes, microfiber cloths, or non-abrasive scrubbing pads to clean surfaces. Avoid abrasive materials that could scratch or damage equipment.
- Rinsing: If using cleaning agents, ensure thorough rinsing with clean water to remove any detergent residue. Proper rinsing prevents contamination of the embryos.
- Drying: Allow all components to dry completely before reassembly. Proper drying prevents the growth of microorganisms.
Disinfecting Process:
- Select Safe Disinfectant: Use an approved disinfectant safe for equipment and hatchery use.
- Prepare Solution: Follow instructions to create the right dilution and wear PPE.
- Apply Disinfectant: Ensure full coverage of equipment surfaces.
- Contact Time: Let the disinfectant sit for the recommended time.
- Rinsing (If Required): Rinse with clean water if instructed by the disinfectant guidelines.
- Drying: Allow equipment to air dry before use.
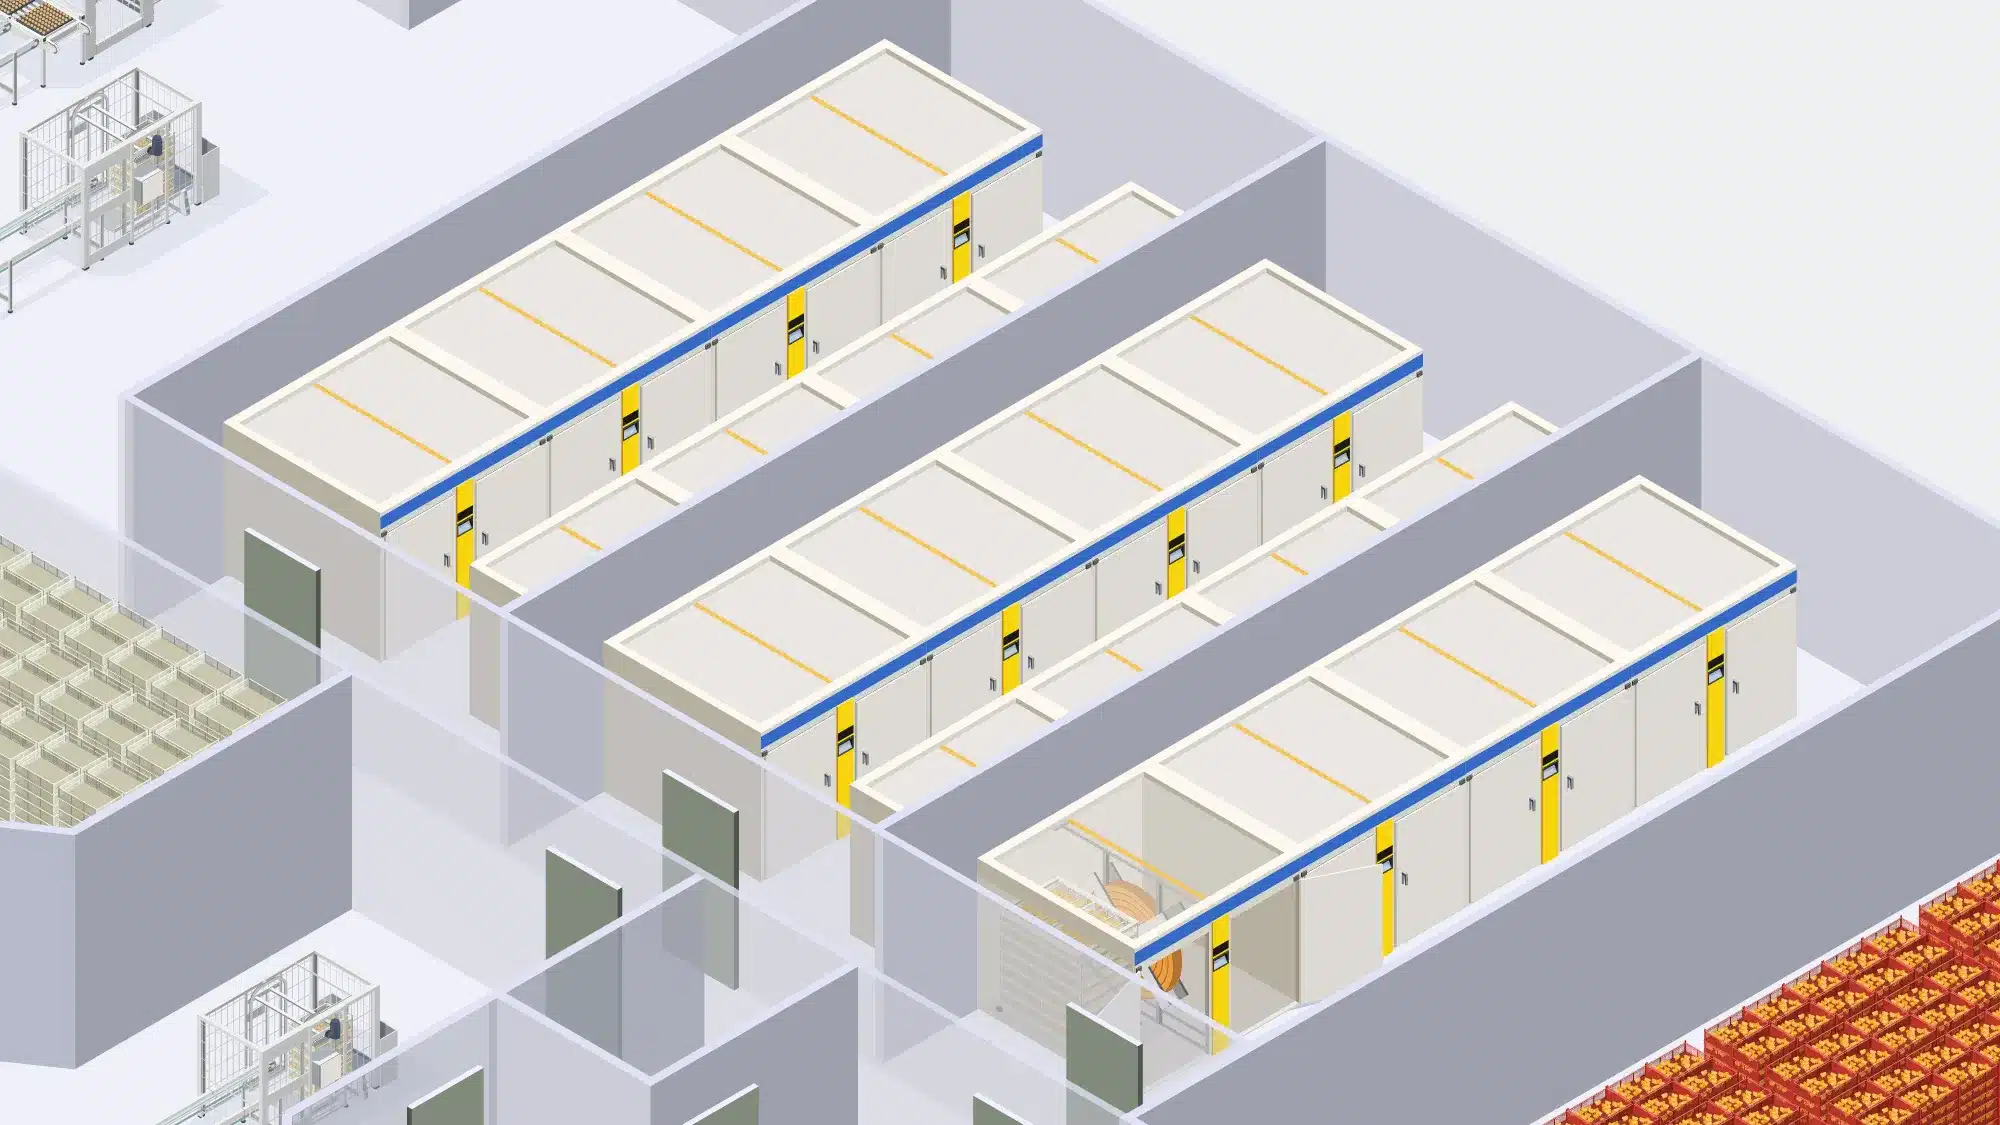
Cleaning and disinfection of the hatchers
The hatching phase is a critical culmination of the incubation process, where carefully nurtured embryos transition into healthy chicks.
Cleaning and disinfection of hatching areas is essential to create a clean and pathogen-free environment for the new hatching chicks.
Preparation:
- Clear the Area: Remove all equipment, trays, and materials from the hatching room to ensure thorough cleaning.
- Ventilation: Ensure proper ventilation by opening windows or using fans to allow fresh air circulation.
Cleaning Process:
- Dry Cleaning: Start by removing dust, debris, and any loose particles from surfaces, walls, floors, and ceilings using soft brushes, brooms, or vacuum systems.
- Wet Cleaning: Use mild detergents or cleaning solutions approved for hatchery use to clean surfaces. Pay attention to areas prone to contamination, such as corners and crevices.
- Tools: For dry cleaning use non-abrasive brushes. For wet cleaning sponges, mobs and pressure washes (when appropriate) can be used. Avoid abrasive materials that might damage surfaces.
- Rinsing: After cleaning with detergents, rinse all surfaces with clean water to remove any residue.
- Drying: Ensure proper drying of all surfaces, as excess moisture can encourage the growth of microorganisms.
Disinfection Process:
- Selecting a Disinfectant: Choose a disinfectant that is effective against a wide range of pathogens and approved for use in hatcheries.
- Preparing the Solution: Prepare the disinfectant solution according to the instructions, and wear appropriate PPE, such as gloves and safety goggles.
- Application: Apply the disinfectant solution to all surfaces, including walls, floors, ceilings, and equipment. Ensure thorough coverage.
- Contact Time: Allow the disinfectant to remain in contact with surfaces for the recommended duration specified by the disinfectant manufacturer.
- Rinsing (If Needed): Some disinfectants require rinsing after the contact time. If required, use clean water to remove any residual disinfectant.
- Drying: Ensure proper drying of all surfaces before reintroducing equipment and materials.
Cleaning and disinfection at chick handling:
Chick handling is a pivotal stage where freshly hatched chicks are carefully managed to ensure their health, well-being, and safe transition.
Cleaning and disinfection of chick handling equipment in hatcheries is crucial to ensure the health and well-being of the chicks during their early stages of development. Proper hygiene practices minimize the risk of disease transmission and promote optimal chick growth.
Preparation:
- Clearing the Area: Remove chicks, bedding, and any other materials from the chick handling area before starting the cleaning process.
- Safety Measures: Ensure the equipment is powered off and disconnected from power sources to ensure safety during cleaning.
Cleaning Process:
- Dry Cleaning: Begin by removing visible dirt, debris, and bedding residues from the equipment using soft brushes, cloths, or vacuum systems.
- Wet Cleaning: Use mild detergents or specially formulated cleaning solutions approved for hatchery use to clean all surfaces of the chick handling equipment.
- Tools and Materials: Use non-abrasive brushes, sponges, or cloths for cleaning to avoid damaging equipment surfaces.
- Rinsing: After using cleaning solutions, rinse the equipment thoroughly with clean water to remove any detergent residue.
- Drying: Ensure proper drying of all equipment components to prevent the growth of microorganisms and mold.
Disinfection Process:
- Selecting a Disinfectant: Choose a disinfectant that is safe for both the equipment and the chicks, and is effective against common pathogens found in hatcheries.
- Preparing the Solution: Follow the instructions to prepare the disinfectant solution and wear appropriate PPE, such as gloves and safety goggles.
- Application: Apply the disinfectant solution to all surfaces of the chick handling equipment, paying extra attention to areas frequently touched or in direct contact with chicks.
- Contact Time: Allow the disinfectant to remain in contact with surfaces for the recommended duration.
- Rinsing (If Required): Some disinfectants might require rinsing after the contact time. If needed, rinse thoroughly with clean water.
- Drying: Ensure proper drying of the equipment to eliminate excess moisture.
Personnel Hygiene:
- Hatchery staff should maintain proper personal hygiene practices while handling chicks and equipment to prevent contamination.
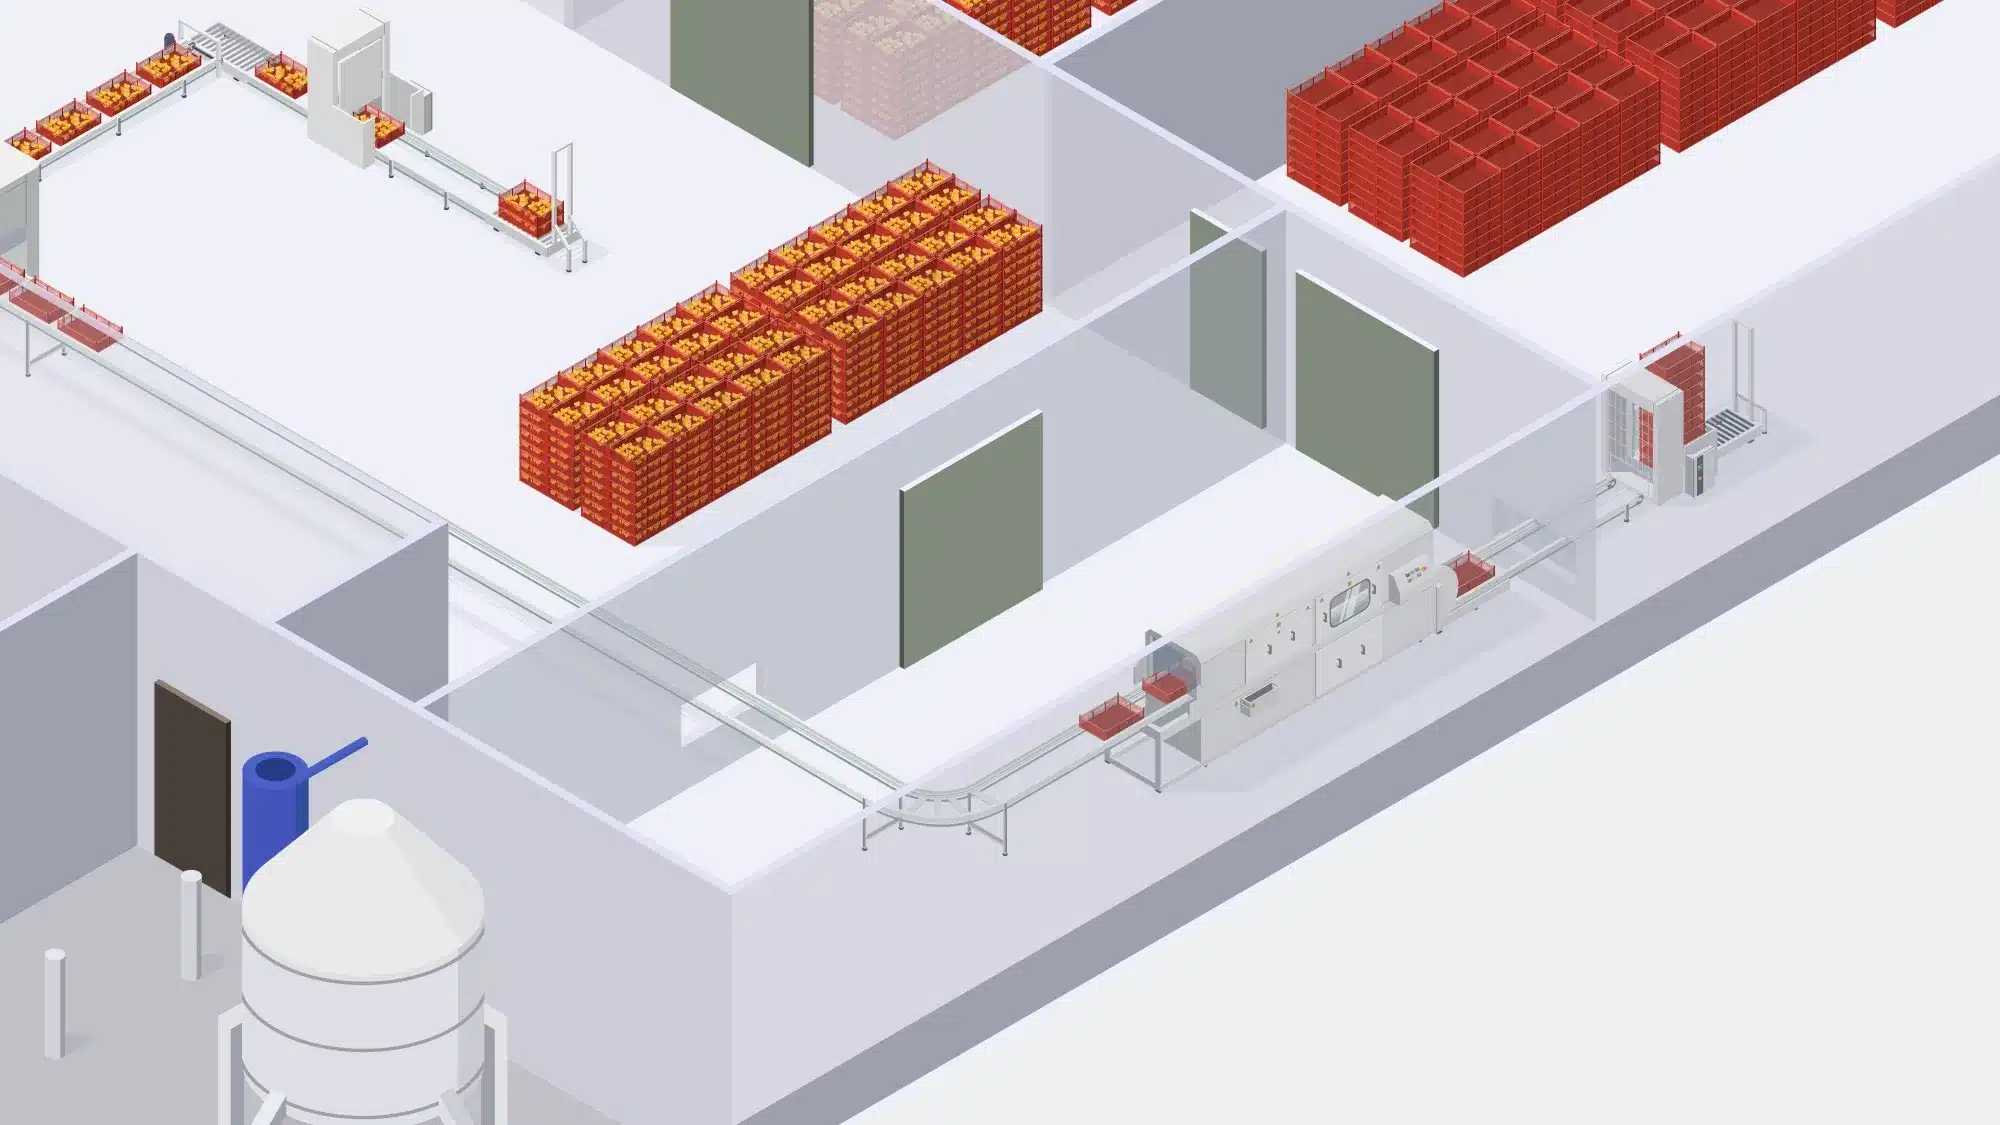
Cleaning and disinfection at the washing and waste handling area
The washing area is where equipment, trays, and tools used in the hatchery are cleaned and sanitized.
Washing Trays and Setters:
- Wash egg trays and setters with detergent solutions to remove organic matter and debris. Ensure thorough cleaning of crevices and corners.
- Rinse trays and setters with clean water to remove detergent residue.
Disinfection:
- Select a disinfectant approved for hatchery use and effective against a wide range of pathogens.
- Prepare the disinfectant solution according to manufacturer instructions and wear appropriate PPE.
- Apply the disinfectant solution to all surfaces, equipment, trays, and setters, ensuring comprehensive coverage.
- Allow the disinfectant to remain in contact for the recommended time before rinsing, if necessary.
Biosecurity Measures:
- Implement strict biosecurity protocols to prevent cross-contamination and the spread of pathogens.
- Establish separate areas for cleaning, waste handling, and other hatchery operations to prevent contamination.
Personnel Hygiene:
- Hatchery staff should follow proper personal hygiene practices, including hand washing and wearing clean protective clothing, to prevent contamination.
Egg handling at a hatchery involves the careful collection, inspection, and preparation of eggs for incubation.
Proper egg handling, cleaning, and disinfection practices are essential to prevent the transmission of diseases and maintain a clean and controlled environment for optimal hatch rates. Cleaning and disinfection during at egg arrival and handling in hatcheries includes:
Cleaning Process:
- Initial Inspection: Eggs are visually inspected upon arrival to identify and remove visibly soiled or damaged eggs.
- Dry Cleaning: Dust, feathers, and other debris are removed from the egg surfaces using soft brushes, air blowers, or vacuum systems.
- Wet Cleaning (Optional): Some hatcheries choose to wash eggs with a mild detergent solution or a specially formulated egg cleaner. However, this step is generally avoided to prevent moisture from penetrating the eggshell, as this could increase the risk of microbial contamination.
Disinfection Process:
- Sanitizing Solution: A disinfectant solution approved for eggshell sanitization is applied, usually through a fine mist or spray. It’s important to use disinfectants that are safe for the embryos and do not leave harmful residues.
- Drying: After applying the disinfectant, eggs are left to dry. Drying helps eliminate excess moisture and prevents the growth of microorganisms.
- Fumigation (Optional): Some hatcheries use fumigation with safe and approved gases to further reduce microbial load.
Setting and incubation are vital stages in a hatchery’s process, creating the controlled environment necessary for healthy embryo development and successful hatching.
Cleaning and disinfection of incubators in hatcheries are crucial processes to create a clean and pathogen-free environment for developing embryos. Proper maintenance of incubators ensures optimal hatch rates and the production of healthy chicks.
Cleaning Process:
- Preparation: Power off and unplug the incubator. Remove eggs and accessories.
- Dry Cleaning: Use soft brushes, cloths, or vacuum systems to remove dust and debris from both interior and exterior surfaces.
- Residue Removal: Gently eliminate stubborn residues without causing damage using a suitable foam cleaner agent, cleaning prepares the surface for disinfection
- Air Circulation: Allow the incubator to air out to reduce moisture content.
Disinfection Process:
- Choose a Disinfectant: Use an approved disinfectant effective against a broad range of pathogens.
- Prepare Solution: Follow the instructions to prepare the disinfectant solution and wear appropriate PPE.
- Apply Disinfectant: Ensure thorough coverage of all incubator surfaces, avoiding oversaturation.
- Contact Time: Allow the disinfectant to sit for the recommended duration.
- Rinsing (If Needed): Some disinfectants require rinsing, which should be done using clean water.
- Drying: Thoroughly dry the incubator to prevent microbial growth and electrical issues.
- Post-Disinfection Checks: Before reassembling, ensure surfaces are dry and free of residual disinfectant.
Candling equipment is used to examine the developing embryos inside eggs to determine their viability, while transfer equipment is used to move eggs between different stages of incubation. Keeping these tools clean and disinfected is crucial to prevent contamination and ensure the health of the embryos.
Cleaning Process:
- Preparation: Ensure that all equipment is powered off and disconnected from power sources before cleaning.
- Disassembly: Disassemble the candling and transfer equipment according to manufacturer guidelines to access all parts and components.
- Dry Cleaning: Use soft brushes, cloths, or vacuum systems to remove dust, dirt, and debris from all surfaces, nooks, and crannies of the equipment.
- Cleaning Agents: Use mild detergents that are suitable for the equipment. Avoid harsh chemicals that might damage the equipment or leave harmful residues.
- Cleaning Brushes: Use soft brushes, microfiber cloths, or non-abrasive scrubbing pads to clean surfaces. Avoid abrasive materials that could scratch or damage equipment.
- Rinsing: If using cleaning agents, ensure thorough rinsing with clean water to remove any detergent residue. Proper rinsing prevents contamination of the embryos.
- Drying: Allow all components to dry completely before reassembly. Proper drying prevents the growth of microorganisms.
Disinfecting Process:
- Select Safe Disinfectant: Use an approved disinfectant safe for equipment and hatchery use.
- Prepare Solution: Follow instructions to create the right dilution and wear PPE.
- Apply Disinfectant: Ensure full coverage of equipment surfaces.
- Contact Time: Let the disinfectant sit for the recommended time.
- Rinsing (If Required): Rinse with clean water if instructed by the disinfectant guidelines.
- Drying: Allow equipment to air dry before use.
The hatching phase is a critical culmination of the incubation process, where carefully nurtured embryos transition into healthy chicks.
Cleaning and disinfection of hatching areas is essential to create a clean and pathogen-free environment for the new hatching chicks.
Preparation:
- Clear the Area: Remove all equipment, trays, and materials from the hatching room to ensure thorough cleaning.
- Ventilation: Ensure proper ventilation by opening windows or using fans to allow fresh air circulation.
Cleaning Process:
- Dry Cleaning: Start by removing dust, debris, and any loose particles from surfaces, walls, floors, and ceilings using soft brushes, brooms, or vacuum systems.
- Wet Cleaning: Use mild detergents or cleaning solutions approved for hatchery use to clean surfaces. Pay attention to areas prone to contamination, such as corners and crevices.
- Tools: For dry cleaning use non-abrasive brushes. For wet cleaning sponges, mobs and pressure washes (when appropriate) can be used. Avoid abrasive materials that might damage surfaces.
- Rinsing: After cleaning with detergents, rinse all surfaces with clean water to remove any residue.
- Drying: Ensure proper drying of all surfaces, as excess moisture can encourage the growth of microorganisms.
Disinfection Process:
- Selecting a Disinfectant: Choose a disinfectant that is effective against a wide range of pathogens and approved for use in hatcheries.
- Preparing the Solution: Prepare the disinfectant solution according to the instructions, and wear appropriate PPE, such as gloves and safety goggles.
- Application: Apply the disinfectant solution to all surfaces, including walls, floors, ceilings, and equipment. Ensure thorough coverage.
- Contact Time: Allow the disinfectant to remain in contact with surfaces for the recommended duration specified by the disinfectant manufacturer.
- Rinsing (If Needed): Some disinfectants require rinsing after the contact time. If required, use clean water to remove any residual disinfectant.
- Drying: Ensure proper drying of all surfaces before reintroducing equipment and materials.
Chick handling is a pivotal stage where freshly hatched chicks are carefully managed to ensure their health, well-being, and safe transition.
Cleaning and disinfection of chick handling equipment in hatcheries is crucial to ensure the health and well-being of the chicks during their early stages of development. Proper hygiene practices minimize the risk of disease transmission and promote optimal chick growth.
Preparation:
- Clearing the Area: Remove chicks, bedding, and any other materials from the chick handling area before starting the cleaning process.
- Safety Measures: Ensure the equipment is powered off and disconnected from power sources to ensure safety during cleaning.
Cleaning Process:
- Dry Cleaning: Begin by removing visible dirt, debris, and bedding residues from the equipment using soft brushes, cloths, or vacuum systems.
- Wet Cleaning: Use mild detergents or specially formulated cleaning solutions approved for hatchery use to clean all surfaces of the chick handling equipment.
- Tools and Materials: Use non-abrasive brushes, sponges, or cloths for cleaning to avoid damaging equipment surfaces.
- Rinsing: After using cleaning solutions, rinse the equipment thoroughly with clean water to remove any detergent residue.
- Drying: Ensure proper drying of all equipment components to prevent the growth of microorganisms and mold.
Disinfection Process:
- Selecting a Disinfectant: Choose a disinfectant that is safe for both the equipment and the chicks, and is effective against common pathogens found in hatcheries.
- Preparing the Solution: Follow the instructions to prepare the disinfectant solution and wear appropriate PPE, such as gloves and safety goggles.
- Application: Apply the disinfectant solution to all surfaces of the chick handling equipment, paying extra attention to areas frequently touched or in direct contact with chicks.
- Contact Time: Allow the disinfectant to remain in contact with surfaces for the recommended duration.
- Rinsing (If Required): Some disinfectants might require rinsing after the contact time. If needed, rinse thoroughly with clean water.
- Drying: Ensure proper drying of the equipment to eliminate excess moisture.
Personnel Hygiene:
- Hatchery staff should maintain proper personal hygiene practices while handling chicks and equipment to prevent contamination.
The washing area is where equipment, trays, and tools used in the hatchery are cleaned and sanitized.
Washing Trays and Setters:
- Wash egg trays and setters with detergent solutions to remove organic matter and debris. Ensure thorough cleaning of crevices and corners.
- Rinse trays and setters with clean water to remove detergent residue.
Disinfection:
- Select a disinfectant approved for hatchery use and effective against a wide range of pathogens.
- Prepare the disinfectant solution according to manufacturer instructions and wear appropriate PPE.
- Apply the disinfectant solution to all surfaces, equipment, trays, and setters, ensuring comprehensive coverage.
- Allow the disinfectant to remain in contact for the recommended time before rinsing, if necessary.
Biosecurity Measures:
- Implement strict biosecurity protocols to prevent cross-contamination and the spread of pathogens.
- Establish separate areas for cleaning, waste handling, and other hatchery operations to prevent contamination.
Personnel Hygiene:
- Hatchery staff should follow proper personal hygiene practices, including hand washing and wearing clean protective clothing, to prevent contamination.

Contact our poultry manager
Martijn Schippers
Martijn Schippers is the General Manager for Schippers USA.